Drilling Automation: Why Aren’t We Further Along?

Current level of Drilling Automation


This week I am going to attempt to provide some answers to the question of “Why we aren’t further along with implementing Drilling Automation?”.
The thing that got me started thinking about this topic was an article in the Journal of Petroleum Technology discussing data accuracy, mainly a paper recently presented at the IADC/SPE Drilling Conference. The topic of that paper was An Algorithm to Automatically Zero Weight on Bit and DifferentialPressure and Resulting Improvements in Data Quality
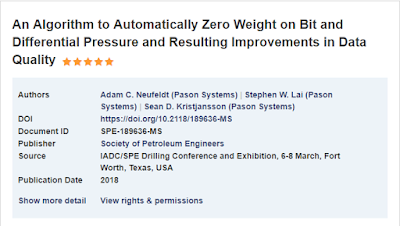
Abstract: SPE189636-MS
The paper details a study by Pason, a company that collects, analyzes, and distributes real time and historical drilling data from rigs in North America. They conducted a study on the accuracy of Weight On Bit measurements and determined that the majority of the WOB data was incorrect due to drillers not properly zeroing the WOB indicator. They proceeded to develop an automated algorithm that zeroed the WOB and another key measurement, differential pressure. This improved the accuracy of the data collected immensely.
The thing in the JPT article that caught my eye was the question, paraphrased here, “What is keeping the industry, as a whole, from collecting more accurate data?” The main answer seems to be that collecting more accurate data is not free. Due to needing to utilize more accurate sensors and having, at minimum, personnel regularly recalibrate those sensors, to developing better sensors and systems, it all costs more money than the current standard provided.
This is a parallel to what we are seeing as a hindrance to progressing with Drilling Automation. Operators want the lowest price they can get to drill their wells, service & equipment providers want the highest price they can get for their equipment, products, & services, and in most cases, what you wind up getting is low-cost provider solution (read minimum quality for cheapest price).
In recent history, most operators have not wanted to help develop new technology and/or practices. While you do see companies like Statoil, Royal Dutch Shell, Apache, and others investing in drilling automation projects and sometimes partnering with service providers to do this, the majority do not.
I think part of the reason why we are not seeing large scale advancements with Drilling Automation is that there is not one entity in control of the entire operation. Factory automation is far easier for at least two reasons: Factories are usually controlled by a single entity and the tasks that are automated are simple, repeatable steps.
Drilling a well is not the same as operating a robotic factory. You can automate a lot of things that are repetitive and can be accomplished by robots. Drilling a well is not the case. There are exponentially more variables involved with drilling a well than welding pieces of a car together. Due to that expansive number of variables, changes in each multiply the contingencies and potential responses needed. To sum it up, it is not an easy task to accomplish. Not impossible, mind you, just not easy.
A lot of wells involve a minimum of three or four different companies working to drill the well. All with different goals and business models. That adds to the complexity. This can be somewhat caveated by Red or Blue rig models where a single service company provides most or all of the various services to the operator on the rig, OR the independent Operator model where they hire their own consultants and utilize third-party suppliers for equipment & products.
So, because of all this complexity, in addition to variations in the market (read: Current, hopefully over, crash in the industry), it makes it hard to make progress with drilling automation.
BUT, there are changes afoot! Industry conferences are starting to highlight Drilling Automation. More companies are becoming involved in the space. With the progress being seen in artificial intelligence, things that someone had to “feel” or “intuit” may soon be reduced to a routine validated by a computer algorithm.
We are starting to see progress. Interest from multiple players, large and small. Companies transferring their expertise from wetware to hardware and software. The singularity for Drilling Automation is not tomorrow. We may never get to a totally automated drilling process with no human involvement, but if we can get 95% there, that will be a huge reduction in cost and increase in efficiency!
And, as always, let me know what you think in the comments. Ask questions, tell your story.
If you like my posts, please share them with others and subscribe to this blog.

Business Startup: 9 Tips for Starting a Small Business with Partners

Today we are going to talk about a very specific subject: Starting a small business with a partner or partners.

The generally understood definition by the United States government for a small business is a business that employs less than 500 people. There are financial considerations that also go along with that, but I am not going to attempt to touch on those here.

With this in mind, the concept of the US economy being powered by small business makes a lot more sense. A large majority of businesses are small businesses.

I would venture to say that there is a sizable portion of the population that if not already running a business, want to start one. Based on that, I am going to provide some tips to get started and hopefully avoid pitfalls that I have run across in my business dealings.

Partners

Select your partners well. This seems obvious, but you need to ensure that goals are aligned, that you want the same things for the business. Make sure that you can work with your partners. Make sure that your personalities do not clash. Make sure that all partners are able to understand viewpoints that are different from their own ideas and give them thoughtful consideration. Put a plan together for how you will proceed and have everyone sign off on it. Avoid partnerships where one or more partners are self-serving and attempt to obstruct ideas that do not favor them.

Duties

Define the duties of each partner for the business before investing any money, time, or effort. Agree on who does what and how it will be done. Have each partner provide a plan for how they will accomplish their duties. This seems a bit like overkill, but the effort put into this exercise will pay dividends in the form of getting each partner to think about what they will be doing and how they will be doing it. That alone is worth the exercise.

LLC or C-Corp

There are other types of legal entities, but this seems to be the most common structure used for small businesses. Depending on the type of business, you may be forced into using a C-Corp entity structure, such as a manufacturing business with inventory. While I am not an attorney and I do not play one on the internet, I am of the opinion that most small businesses are best served by an LLC structure.

In an LLC structure, the entity is considered a pass-through entity, so the profits of the company are passed through to the partners based on shares of equity in the company, to be reported on their personal income taxes.

With a C-Corp, the company is taxed, then dividends passed on to the shareholders (partners) is taxed again.

Operating Agreement

This is also a big one. The operating agreement can be based on the details pulled together in the Duties step. It just formalizes how the company will operate and documents the what & how for each partner. It also should contain exit strategies for each partner and for the company as a whole. This is probably more geared towards an LLC entity, but also has relevance to shareholders in a small private C-Corp.

Entity Name

If you already have a good idea for an entity name, then obviously, use it. But if you don’t, there is no need to stress out over it. Pick a name and as long as it is not already in use or trademarked, it will be good. If you later want have specific company branding/marketing, you can create a “Doing Business As” or DBA name. In most cases, all you have to do is file a form with the state for it to be recognized.

Employer Identification Number (EIN)

The Internal Revenue Service (IRS) uses the employer identification number or Tax ID as an identifier for businesses so they can track income and revenue. It costs nothing and can easily be applied for online.

Business License

Depending on the nature of your business, you may need to get a parish, county, or city business license. They are usually just a nominal fee, but not a whole lot. (Caveat: larger cities may have more exorbitant fees).

Business Bank Account

Always use a business bank account for your business finances. Keep your personal finances separate from your business finances. This will help to keep track of how well your business is doing.

Accounting

For accounting purposes, you can start out tracking everything in a spreadsheet. Document revenue, document expenses. Depending on the nature of the business, you may need to do a little more than that and use an accounting software program or service. Once you reach a level where revenue and cash flow allow it, accounting tasks can be delegated to a book keeper.

I would also like to recommend using a CPA for filing your taxes. Having a good CPA on board will keep you out of trouble. Especially if a partner decides it is someone else’s job to get all documentation to said CPA at tax time. The CPA will file an extension on your behalf to keep you out of trouble.

And, as always, let me know what you think in the comments. Ask questions, tell your story.

If you like my posts, please share them with others and subscribe to this blog.

REI – Analyzing a Property as a Rental

This week is a bit of a follow-up to last week’s article about finding your breakeven point. I covered what you needed to look at and why it was a good idea to know what your breakeven point was before you get into a business. Now I will apply similar principles to Real Estate Investing.

Today, I am going to go over what I look at when I evaluate a property to add to my portfolio. My strategy for real estate investing is Buy and Hold, meaning that I buy properties and intend to keep them long term, renting them out to tenants.

Cost Assumptions

For cost assumptions, I use the asking price, and an estimated cost of improvements (rehabbing property) & estimated closing costs (approximately 3% of price of property).

Finance Assumptions

Use a mortgage calculator to determine monthly debt service payment. Set the desired term (15 yrs, 20 yrs, 30 yrs, etc.), down payment, and interest rate.

Gross Rents

Gross Rents are the total rents expected to be collected on a monthly basis. This can be rent form a single-family home or a multi-family property such as a duplex, triplex, or larger apartment property.

Vacancy

To account for vacancy and deduct a percentage from your gross rent before deducting expenses. I generally use a conservative vacancy percentage like 10%. While I will more than likely not  have 10% vacancy in a year, accounting for it helps me to ensure the  property will always  cash flow.


Expenses

So, once I have a property to analyze, the first thing I do is verify the expenses. For the most part, the costs should be relatively the same, with the exception of property taxes.
I account for the following expenses:

  • Property Taxes
  • Insurance
  • Maintenance & Repairs
  • Utilities
  • Advertising
  • Administrative
  • Variable Cost Property Management
  • Lawn Care / Landscaping
  • CAPEX

Property Taxes can usually be found on the local parish or county assessor’s website. You just have to search for the property address and all of the details for the property are listed. Who owns it, what municipal assessed value is, what the property has sold for, and what the city and parish/county taxes are estimated at for the current year.

Insurance can be estimated by getting a quote from your insurance agent/provider or if you have a similar property, you already have an idea what the cost is.

Maintenance & Repairs covers anything short of replacing major components of the property.
Utilities are what you expect to pay for utilities while doing turnover or when the property is unoccupied between tenants.

Advertising is the costs for paid advertising to attract tenants.

Administrative are the costs for anything administrative to do with operating the property as a rental. This covers book keeping, accounts payable, accounts receivable, etc.

Variable Cost Property Management is a percentage of gross rents paid to a property manager to manage the property. I account for this as an expense even though I manage my own properties so in the event I decide to engage a property manager, I already have that cost covered and don’t have to worry about adding a PM cutting into my cash flow.

Lawn Care/Landscaping covers grass-cutting when the property is not occupied and/or if the property is a multi-family property where the tenants don’t normally take care of the lawn.

CAPEX is an amount put aside to cover major repairs such as replacing the roof, appliances, flooring, plumbing, electrical, etc. That way, you have the money to cover these repairs instead of worrying where to get the money from.


The Analysis

Once I have gross rents, vacancy, cost assumptions, and expense values collected, then the analysis of the property can begin. I use a spreadsheet to conduct my analysis and it is set up to tell me what I need to know. There are inputs for all of the items listed so far.
I enter the asking price, my desired finance terms, estimated gross rents, and estimated expenses.
I then evaluate whether or not my targets are met at the property’s asking price. If it does not, I then start adjusting the price downward until I reach my target numbers.
For me to consider a property a good deal, it must meet the following criteria:
Cash flow >$100 per door and have >12% Cash on Cash Return, if financed
Cash flow >$400 per door and have >6% Cash on Cash Return, if purchased cash
Be in a decent neighborhood

Cash Flow
Cash Flow is the amount of money from gross rents (revenue) remaining after expenses and debt service are covered.
Cash on Cash Return 
Cash on Cash Return is the annual amount of return you get compared to the amount of cash you spent to acquire the property.


By comparing gross rents, total costs, expenses, debt service, and returns I am able to decide if a property will be a money-making addition to my portfolio. By continuing to add properties to my portfolio that cash flow, I get closer to my “Freedom Number”. Where my passive rental income covers my personal costs and expenses, so I don’t have to worry about needing a job.

And, as always, let me know what you think in the comments. Ask questions, tell your story.

If you like my posts, please share them with others and subscribe to this blog.

Business Finance: Knowing Your Costs or How to Find the Break-Even Point of Your Business


“The break-even point (BEP) in economicsbusiness—and specifically cost accounting—is the point at which total cost and total revenue are equal.”

This week’s topic is knowing your costs for your business or the Break-Even Point (BEP).

Before starting a business (or buying one), you should understand what your Break Even Point is. The BEP is where you have enough revenue coming in to cover all of your expenses. It means $0 in profit, but also that all expenses are covered.

Knowing what your BEP is can be beneficial in evaluating how much of your product or service you will have to sell to begin generating profit. It is always better to have this information before engaging in a business rather than trying to figure it out after you are already involved.

Direct Expenses

When determining the BEP, there are some differences between how to calculate this information for a Service Business and a Manufactured Products Business.

  • Service Businesses are fairly easy in that you only need to tally up your direct expenses. This could be done on a monthly basis, but if you have expenses that come up at different times of the year, it is easier to estimate a total annual expense and divide it by 12 to give you a monthly expense amount. (At least that is what I have found when analyzing rental properties).
  • Manufactured Products Businesses are slightly more complicated in that you need to understand what the Gross Profit (GP) on the products are. Gross Profit is the Total Sale Price minus the Cost Of Goods Sold (COGS – materials, labor to assemble). Once you know what your GP is, you will be able to calculate the BEP for the product.
Indirect Expenses

The next step is to gather all of your indirect expenses. This can include rent, utilities, sales, and distribution expenses. Anything that is not directly involved in the provision of a service or the manufacturing of a product.

Once you have all of your numbers, you can calculate your BEP.

For Service Businesses, your BEP is the sum of your direct and indirect expenses. If you bring in enough revenue to cover just those expenses, you have broken even.

For Manufactured Products Businesses, you simply divide your indirect expenses by your GP % to arrive at your BEP.

Example: Indirect Costs: $20,000; GP: 31%; $20,000/0.31= $64,516.13

As I stated above, it is a good idea to have this information before you are involved in a business. Once you understand where you stand with reference to a BEP, you can start to work on optimizing you costs & methodologies to increase efficiencies, lower costs, and lower the overall BEP for that business.

And, as always, let me know what you think in the comments. Ask questions, tell your story.

If you like my posts, please share them with others and subscribe to this blog.

REI: Kick Yourself in the Ass Gotchas

Image from US Patent #6,293,874…”User-operated amusement apparatus for kicking the user’s buttocks”

Today I am going to cover some things that we experienced last year while rehabbing a house acquired to become a rental.

This was our first acquisition, so I wanted to be thorough in analysis, planning, and execution. I had a home inspector check for problems with the house. He checked the electrical, cooling, foundation, plumbing, water heater, and roof. Issues were pointed out with the electrical, gas valves, air conditioner ductwork, and a couple of other minor things.

I brought in the following for estimates:

  • An electrician to fix the issues pointed out by the inspector and to add GFCI outlets near the sinks.
  • A plumber to replace supply valves & faucets in the kitchen and bathroom, gas supply valves for the stove and water heater, and to re-route the overflow drain for the water heater.
  • A HVAC contractor to replace the ductwork.
  • Multiple contractors to bid on the rest of the rehab stuff.

I thought I had things well covered. I was wrong. The first shock was that we had to replace the whole interior HVAC system. The furnace part was rusted through and a fire hazard. That wasn’t too bad, as we had a buffer in our budget for overages and $4,200 wasn’t going to kill it. (That price did include replacing the duct work.)

The next surprise was after the first tenants moved in, they attempted to wash clothes and the washer drain overflowed into the utility room. A phone call to the plumber and a day of trying to unclog the drain, it was determined that years ago, when the neighborhood was converted over to municipal sewerage, the original owners never bothered to tie in the utility room drain to the main drain line and just left it connected to the main field drain in the back yard, which had since collapsed, thus restricting flow and backing up into the utility room. Add another day for the plumber to route a drain through the wall and across the back patio (most likely the condemned septic tank) and tie it into the main drain line at a total cost of approximately $700.

Caveat: We will have to eventually add a full drain line underground tied into the main system

#SilverLining: We will now have the drain necessary to convert part of the utility room to a half bath at some point, increasing the value and desirability of the property.


At one point, the original owners of the house upgraded the windows to vinyl double-paned glass. In doing so, there were gaps in between the windows and the sill in some rooms. I notice them, but in triaging everything that needed to be done, they kept falling to the bottom of the priority list. And, they never got done. Additionally, we kept finding wasps in the room where the gaps were the biggest. It seemed unrelated. The tenants actually correlated the gaps with the wasps continuously appearing in that room and asked for me to fix it. It didn’t take more than some expanding foam and caulk, but, like the other items listed here, I should have recognized the issues and fixed them prior to the tenants moving in.  Total cost for the fix: about $25.

So, for the next property we purchase, I will make sure that we check all drains for restrictions, ensure all trim are sealed, and plan to continue to have the HVAC contractor evaluate the heating & cooling system. This will help to save extra work that we did not budget for and aggravation for us and the tenant in getting the issues mitigated.

If you have rental property, have you run into things like this? Let me know in the comments below.

And, as always, let me know what you think in the comments. Ask questions, tell your story.

If you like my posts, please share them with others and subscribe to this blog.

Equipment Automation – Drilling Fluids

Various pictures of industrial and oilfield automation. The bottom center, top center, and bottom right images are of the DRU.


Today’s topic has to do with Equipment Automation, and more specifically, Drilling Fluids Equipment Automation.
First, a brief history of drilling technology:
  • Early drilling systems used the equivalent of a heavy chisel hanging on a cable down in a hole to “drill” for oil. The “cable drill” would be raised and lowered rapidly to break the rock, thus deepening the hole.
  • Later systems put a bit on the end of lengths of pipe and rotated the pipe to deepen the hole.
  • Drilling fluids were introduced to cool & lubricate the bit and carry the cuttings out of the hole. They were consisting of water and other chemicals to maintain density and viscosity.
  • Invert Emulsion Muds (IEM) were later developed to further inhibit interaction between the drilling fluids and the formation being drilled.


The main tools used to maintain the drilling fluids were a rheometer, a tool developed to test the viscosity of paints to ensure the pigment particles remained suspended, and the mud balance, a tool used to measure the density of a fluid.
***The above history does not contain all innovations, reasons, or details***
Up until 2015, the mud balance and the rheometer were still the two main tools used to monitor the properties of drilling fluids. They additionally use other tools, such as retorts to determine the fractional content of oil, water, and solids in a fluid, chemical titration to test things like alkalinity, calcium content, & chlorides content, in addition to HTHP filter press, a tool used to measure how much of the liquid portion of a drilling fluid will “leak out” through a porous medium, usually filter paper, across a standard differential pressure.
Prior to 2015, quite a few companies have worked on automating drilling fluids testing, including the company I work for, Baroid, a part of Halliburton.
**Disclaimer: I am part of the group that worked on this**
The testing covered varied from density meters to simulated viscosity to solids analysis. The main issue was that the results were either inaccurate or the specific test itself was not necessarily a must-have.
We initially built or had built various automated prototypes of testing apparatus. One was a fully automated retort. If you are not familiar with a retort, it is designed to bake the liquid out of a measured volume of fluid at a high enough temperature to also separate out oil and water content. This test allows drilling fluids engineers (or mud engineers) to determine how much oil, water, and solids are in a fluid. It also allows them to calculate the amount of high gravity solids (desired) and low gravity solids (not so desired) contained within the fluid. The approach the company we contracted for a prototype took was to just automate the manual process. So the result was a big box that took in a measured amount of fluid, cooked off the liquid, reheated the liquid to separate the oil and water, then used LASERS! to measure the amount of oil and water.
They had also included a mini-CNC arm inside the box, specifically for the cleanup part. It would pick up a “retort spatula” attachment to scrape the dried mud residue from inside the retort cell, then it would pick up the wire brush attachment to get the final bits of dried mud from the cell walls. There was a vacuum component that sucked up all of the dried mud residue and dust while the cleaning operation was going on. It was kind of amazing to watch!
Alas, as amazing as it was to watch, it was not practical as a field application precisely due to the amount of moving parts…there were way too many things to break down. Too many things needing hands-on attention during its operation. When a piece of equipment like this is sitting 100 miles offshore, that is too isolated to be able to send someone every couple of days to clean it out or fix something.
We realized that we needed to focus on the critical measurements for running drilling fluids. The properties measured on the most frequent basis are density and rheology. Additionally, as part of the automation strategy we developed, density, rheology, and fluid temperature are the primary inputs for our real time drilling and hydraulics simulator.
Our first unit was dubbed RTDV, Real Time Density & Viscosity. It was a good start, but was not able to provide us with accurate results. Based on extensive analysis of the RTDVs operation, we started a redesign project based on lessons learned. The biggest issues were lack of continuous unattended operation, inaccurate rheology readings, and the ability for air or gas entrainment to affect the density readings.
The next generation unit was named DRU or Density Rheology Unit. It captures a pressurized density, approximately every 1-2 minutes, and a full 6-speed rheology every 10-20 minutes, depending on ambient fluid temperatures because it heats the fluid to a set testing temperature.
It was deployed on late 2015 on a commercial basis and received industry press and awards on 2016.
Our goal is to automate all fluid testing. What’s funny is that when we say that, drilling fluids engineers ask if we are trying to get rid of their jobs. That is just short-sighted thinking.
As things currently stand, in a 24 hour period, just to accomplish the standard required tests, it takes about 6 hours. That’s a full 25% of the day spent in a lab, possibly not paying attention to operations. And that is for only four sets of test results.
Yes, there are opportunities to check on things while tests are running, BUT, What if the fluids engineers didn’t have too spend all that time conducting tests? And what if they could see those test results more frequently? How much better could they maintain the fluid properties?
There are other companies coming out with new technology and have the ability to measure a few properties, but I don’t think that they have the broad vision for an integrated suite of sensors in addition to a plan on what to do with the data once it is captured.
But I do.
But we do.
Look to the future…

Let me know what you think in the comments. Ask questions, tell your story.

If you like my posts, please share them with others and subscribe to this blog.

Real Estate Investing: Getting Scammed by a Contractor

Actual picture from one of our properties.

One of the last things you want to do is to get scammed as a real estate investor. It will happen if you are not prepared and do not have systems and processes in place to keep you from getting scammed.

Story Time

When we decided to turn my in-laws house into a rental, we started to look for contractors to do the rehab on it because I was too busy with work to do it myself (and I wasn’t that great at what was needed anyway).
We asked around on Facebook, but didn’t get a whole lot of suggestions. A friend of a relative could do some of it, but we wanted to get someone to do all of the work.

My wife heard an advertisement on a local radio station for a home improvement contractor, so we called him to get a bid. He gave us a fairly cheap bid and said he could start working immediately. We decided to use him. (Mistaken Thinking #1: Since he was advertising on the radio, he must have been a legitimate contractor.) He told us he was licensed and insured, so we believed him (See mistaken Thinking #1). He then asked for a 30% down payment to be able to purchase materials, so we paid him the down payment. (Mistaken Thinking #2: It’s OK to pay a down payment before work starts.) After six weeks of no work being done except removing the one piece of baseboard and shoe molding in the picture above, in addition to him coming to us for additional material draws (that we paid), we finally realized that he wasn’t going to do the work.

We suspected something was up after four weeks, but didn’t want to believe it. Thankfully our state has a contractor Fraud law and between our complaints and complaints of other victims from surrounding area, there was enough to arrest him. He made a plea deal and has paid back almost half of the money he owes us.

Tips for dealing with contractors:

  • ALWAYS VERIFY their state-issued contractor’s license! Your state’s Contractor Licensing Board or a similar entity should have a way for you to verify that the contractor’s license is still active via a website.
  • ALWAYS VERIFY their Insurance Certificate! Call the insurance company and/or agent to verify. These days, anyone can create counterfeit insurance certificates online. Their insurance protects you if one of their employees gets hurt on the job.
  • Check references. You usually will be referred to contractors by other friends or investors who have used them before and can vouch for their work.
  • Sign a contract that details the following: (Disclaimer-I am not a lawyer & I don’t play one on the internet…always check with your own attorney!)
    • Scope of work to be performed
    • When the work will start
    • How long the work is expected to take
    • What milestones need to be achieved, satisfactorily, to qualify for a draw
    • Check on the contractor’s work frequently to ensure timely completion

We eventually found a really good contractor who came in and rehabbed everything in the house for us in about a month for a really good price. And we have been renting out the property ever since.

Let me know what you think in the comments. Ask questions, tell your story.

If you like my posts, please share them with others and subscribe to this blog.

Online Workflow Automation

Left: Manual Process; Multiple queries to multiple parties.
Right: Workflow Automation directs processes smoothly.

A couple of weeks ago, I was looking into tools to help automate workflows, preferably online tools. My initial premise was that I wanted to be able to track steps, tasks, and procedures in our real estate investing.

Some of the tasks can be accomplished by the popular IFTTT service. But what I have figured out is that the majority of what you are able to do with IFTTT is geared towards personal convenience and not business processes.
Initially, I was looking at Microsoft Flow, an online workflow automation tool, but while investigating some the connectors for it, I found some built-in integration capabilities already exist in services like Trello and Slack. So, deeper down the rabbit hole I went.
I was able to set up a Slack workspace and that in itself is a pretty cool tool for facilitating and capturing communications, documents, and other business-related information,in addition to being able to tie in to my G-suite Docs.
I mentioned Trello above. I had looked at them in the past, but had not really found it useful for what I was wanting to do, at initial glance. I also remembered that the manufacturing business we invested in uses it to track orders and everything related to the orders. I contacted the investment partner who had set it up and asked him to explain how they were using it.
It is set up like a Kanban board and as each task or set of tasks is accomplished, it is moved to the next stage in the order process. What I don’t like is that it is not automated. Each “card” (where the order information and communications are captured) is moved manually from one column to the next when someone accomplishes a milestone in the process.
A similar service called Pipefy appears to provide the same Kanban-style setup, but it looks like you can set triggers for the cards to automatically advance from one column to the other. Since I just found it as I am writing this post, I don’t have time to investigate yet, but it looks pretty powerful. I think it has the potential to claim a spot in my workflow automation toolbox.
Anyway, I can visualize building out steps the process across the columns and have each card contain the tasks needing to be completed before it moves to the next column.

The more I thought about this, I realized that by combining Slack with something like Trello for the manufacturing business, we could achieve a few long-term goals. Trello actions could be reported into a Slack channel, giving us, (investment partners), a simulacrum of a real time dashboard of what is going on with orders in the manufacturing business. A similar setup could be made for product quotes. Slack channels could be used for communication between employees, management, and investors, respectively. Other channels could be used for Knowledge Management (KM)…a living archive of answers, best practices,documents, etc. I think I will call that channel #stunt_brain!

There are other options for automation and integrating various online applications like Podio, Zapier, and Zoho CRM. I haven’t played with them much, so I can’t really say a whole lot about them other than they exist.

Hopefully this has given you some insight into what I thought to be cool tools to bring efficiency to your workflow.

Let me know what you think in the comments. Ask questions, tell your story.

If you like my posts, please share them with others and subscribe to this blog.


Real Estate Investing: How We Started Out

Like the game Monopoly, you can grow your money with Real Estate.

This week, we are going to talk about how we started investing in real estate. It wasn’t an overnight decision, or result, for that matter.

My first foray into real estate investing (REI) was to partner with one my uncles and my cousin (his son) to develop an RV park in the Port Fourchon area. It seemed like a great idea…lots of potential for revenue and extended development. And I knew nothing about evaluating the deal to see if it was going to be a money maker or not. I put up the money to initiate the lease of the land ($20,000) and we proceeded to get a loan from a local bank to develop the park. We had to get permits, evaluations, inspections, etc.  The total amount from the bank came to $150,000. Just as the park was about to open, the BP Macondo/Deepwater Horizon oil spill happened and shut down the oil & gas industry in the Gulf of Mexico. The space was leased to a catering company as a staging area for feeding spill cleanup workers and to facilitate a training space.

We eventually opened up the park and began operating. My cousin and his wife managed the operations.

I began traveling around the world a good bit for work and realized that I could not be deeply  involved in the deal in addition to my wife not being happy with me involving us in it in the first place. My cousin offered to buy us out for $30,000, paid over time. This worked for us as it got our  money back, along with about a 17% total ROI.

While the deal made us money, the stress and aggravation of not being in control left us with a bad taste in our mouths.

Fast forward a couple of years and we decided to remodel my in-laws’ home to set up as a rental. My father-in-law passed away the preceding year, leaving the home to my wife. We got it remodeled after a few false starts and bumps in the road. And started renting it out.

I mostly stayed hands-off of the operations and mainly just helped handle repairs & stuff, since it was my wife’s house (via inheritance).

Towards the end of 2015, I started to get aggravated with my job, (for the nth time), and started a more serious search for something else that I could rely on for income. In January of 2016, I found Bigger Pockets, an online forum/educational platform for real estate investors. It was then that I realized that REI was something that I could do. In fact, in a way, we were already doing it. The thing that appealed to me about it was that successful investors rely on systems and processes to make their businesses run well. WOW! I am a “Systems & Processes” type of guy! It was an epiphany, of sorts.

I started listening to podcasts, devouring forum posts related to my topics of interest, attending real estate investor association meetings, and reading books to learn about how to reach my financial goals through  REI. I put together a 30,000 foot overview of what I would like to do and how I could do it. When I discussed my idea with my wife, she was initially skeptical because I repeatedly come up with plans to make money and either never initiate them or follow through on them.

I continued to learn about buying and managing rental properties, along with operating a business. I became more involved in the operation of the existing rental, more or less making it my responsibility.

So, that is how we got started in REI.

Let me know what you think in the comments. Ask questions, tell your story.

If you like my posts, please share them with others and subscribe to this  blog.

My History With Money, Pt. I

What I grew up seeing around me.
What I wanted to do.

Today I am going to relate my experiences with Money from when I was a child to present day, in a loose chronological order.


My parents split up when I was approximately 10 years old and I don’t really remember a whole lot about our finances prior to that. What I do remember is that after that point, things were not easy.


We moved in with my grandparents, away from friends and family, started a new school, and began a different life. At the end of that school year, I began an unwanted tradition of working every summer on one of my grandfather’s shrimp boats and later in my uncles’ seafood businesses. Whatever money was earned went to help cover costs for my mother, my sister, and me to survive. I would get a hundred dollars at the end of the summer to buy school clothes for the upcoming year and that was the about all I would see of what I made.


My cousins of a similar age were doing the same work as me, but they got to keep all of their money, spending it on nice stereos, toys, etc., because their parents were making money and running a business.


I started learning about the businesses because it seemed like the way to not be poor. What I learned, besides the mechanics of actual operations, were bad money management habits.

Things seemed to be all about making sure you got your share out of the revenue, to the detriment of everything else…spending the holidays at hunting camps, spending the last bit of money you have, with no guarantee of future revenue.

This is not a good model to follow, especially if you are trying to maintain a steady income, much less, grow your income. Eventually, within a few years, both uncles were out of money, with no business to support them, because they only focused on the “right now” and had trouble planning for the long haul.

The takeaway lesson from today’s post is to not spend everything you make. Practice restraint and plan for the future. Short of winning the lottery like a former co-worker, you will not get rich quick. BUT, if you practice this as a habit, it should allow you to prepare for retirement.

Let me know what you think in the comments. Ask questions, tell your story.

If you like my posts, please share them with others and subscribe to this  blog.

 
Verified by MonsterInsights